How do I add a Banner and Logo to my Community Website (new responsive websites)
Summary/Goal
Your community or company logo and the banner is a significant aspect of your branding and the values it stands for. The intent of this article is to outline the steps to add your logo and banner to the website.
Steps:
- Navigate to the Community tab and click on the "Community Website" link.
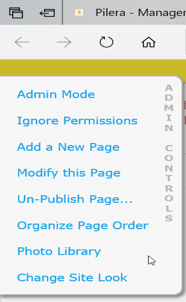
- In the Admin Controls located on the left side of your screen, click "Photo Library".
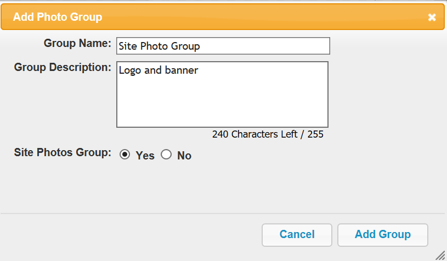
- Click "Add a Group". Title this group "Site Photo Group", give it a brief description and select "Yes" to confirm this as a Site Photo Group. Note that "yes" must be selected, or these images won't be added as a logo or banner. Also, note that only one folder should be marked as "site photos group".
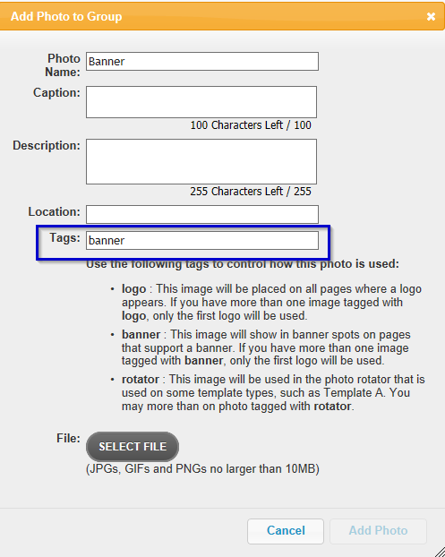
- Click "Add Photo to Group". Enter in the name, description, and location. Next, enter in the tag as follows. Tags are unique identifiers for site-wide images on your website and must be spelled out exactly like the following and are case sensitive.
- Tag for the logo is "logo" (without the quotation marks).

- Tag for the banner is "banner" (without the quotation marks).
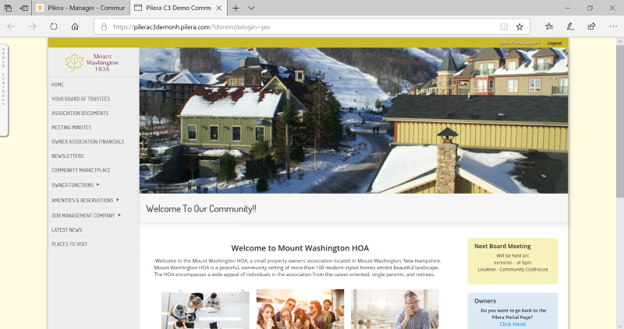
- Once you've added the images, refresh your browser and the changes will be propagated onto the website.
Tutorial Video:
Conclusion: Adding the logo and banner in Pilera is a simple way to enhance your community's brand identity. Tagging the logo and banner in the site photo, as shown above, will ensure that the images will propagate accordingly on the website.