Understanding the Message Center, and seeing a history of your community communications
Summary/Goal:
To provide managers with a better understanding of their communication method efforts through the Message Center.
Step by Step:
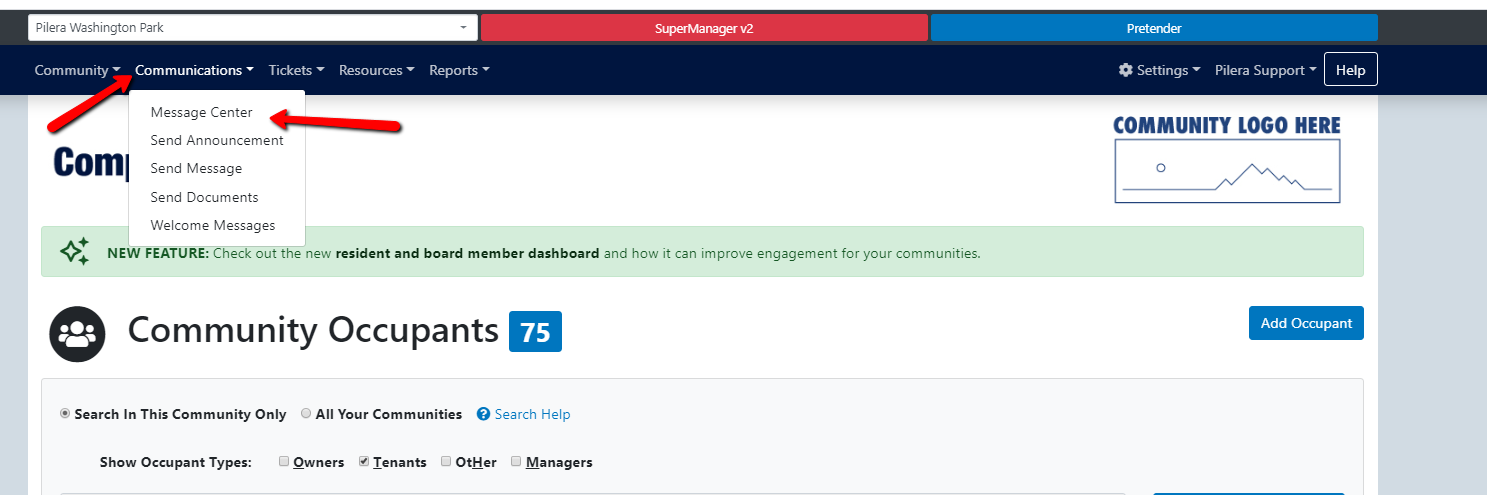
Accessing the Message Center:
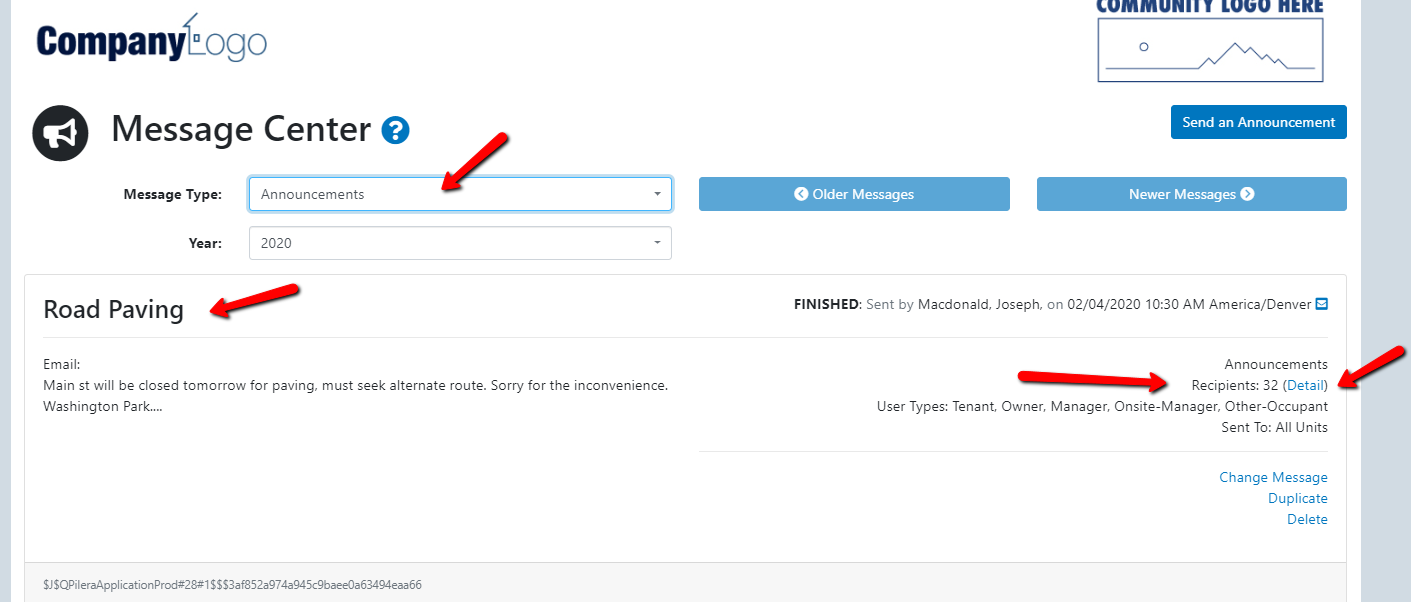
Viewing a Specific Category of Messages Sent:
Example: Search for all messages sent regarding “Rule Violations”.
Conclusion: The message center allows you to retrieve all your messages, categorized by subject, to view a snapshot summary as well as comprehensive details on the message. A detailed view allows you to see each communication method status for each recipient.
To provide managers with a better understanding of their communication method efforts through the Message Center.
Step by Step:
Accessing the Message Center:
- After logging into Pilera, you will be directed to the Occupants Page.
- CLICK on Communications tab, and then click Message Center.
- The message center page will show you a snapshot of all sent messages with the following details:
- Title
- Sender
- Date and time of sending
- Communication method (Phone, Email, Text)
- Short description of the message sent through each communication method
- Summarized content of the message
- An option to delete the message.
Viewing a Specific Category of Messages Sent:
Example: Search for all messages sent regarding “Rule Violations”.
- In the Message Center page, click on the Message Center dropdown, and select “Rule Violations”. The page will be populated with all messages containing that subject.
Was my message sent, and was it received?
Example: You get a call from a resident saying they didn't receive the announcement on Road Paving earlier that week. How do you know if they received the message? Use the following steps to find out:
- Upon selecting “Announcement” in the Message Type dropdown, all the messages sent in this category can be viewed.
- The top-most message sent is the most recent. Click on Details to view more information.
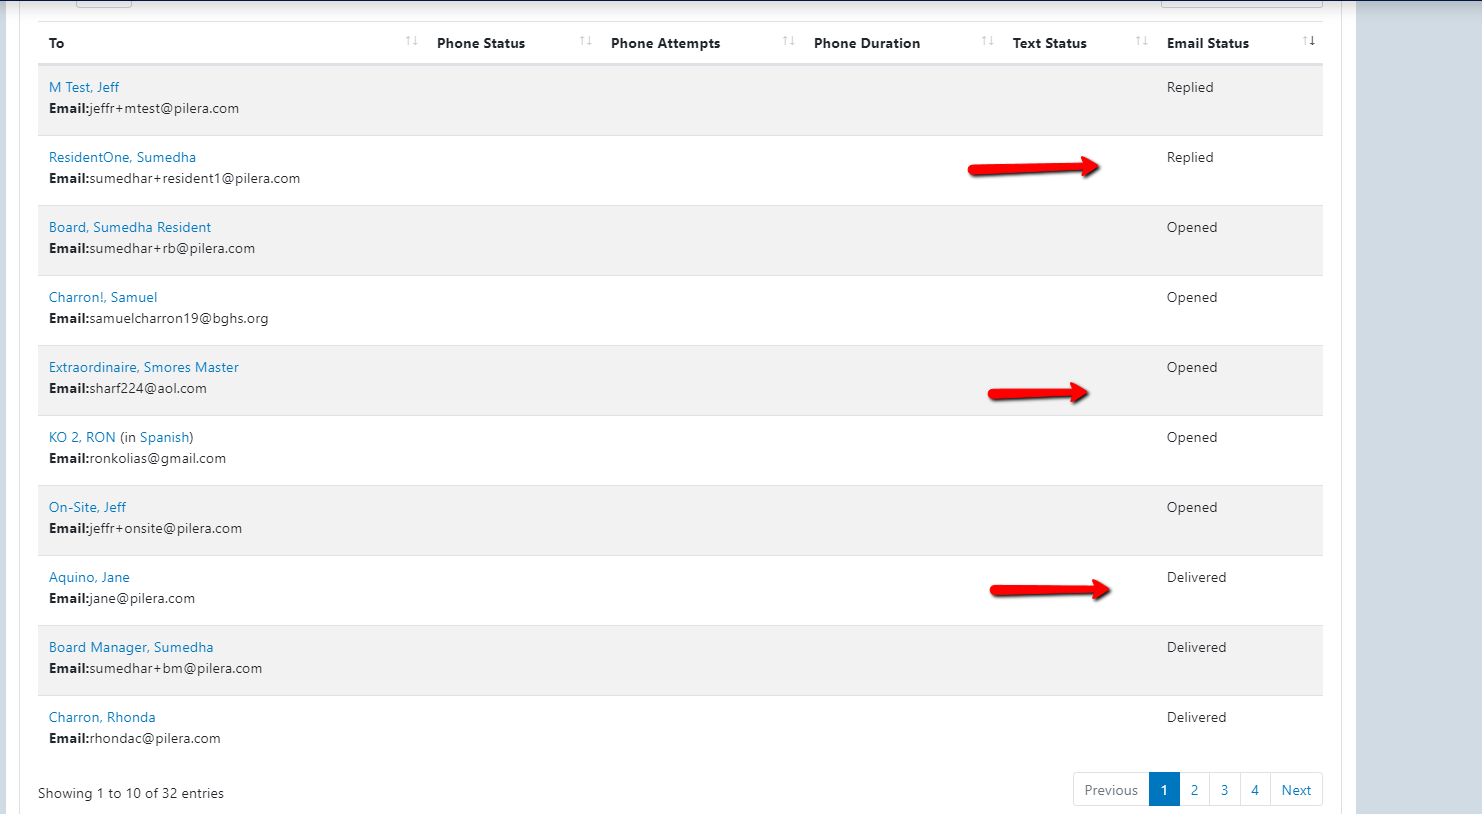
- Upon clicking Details, you will see more information about the message:
- Status of phone call
- Number of attempts made to call the contact
- Call duration
- Email status.
- This information will be populated for each recipient in real-time.
- Click Less Detail to collapse the message record.
Conclusion: The message center allows you to retrieve all your messages, categorized by subject, to view a snapshot summary as well as comprehensive details on the message. A detailed view allows you to see each communication method status for each recipient.
Related Articles
Types of Automated Reports in Pilera
What are automated reports? Pilera sends automatic reports straight to your inbox on various functionalities you use in Pilera. Please make sure that you add Pilera to your email contacts so that these emails reach your inbox in a timely manner. ...How to select Communications Preferences for residents
How to select communications preferences in Pilera? In this article we will show you how you (as a manager) to set your resident's communications preferences. These preferences are used for how residents would like to receive the community ...Welcome Message Dashboard
Summary/Goal: This article reviews the welcome message dashboard feature and how to send welcome messages in batches. This dashboard shows statuses for email, last sent, and last logged in. Let's go over each status: Email - This column displays ...How to create a Community Notice
How to create a community notice Pilera released this new feature so that managers could place a notification or message on the resident's homepage when they login to Pilera. This message could be posted in preparation for a storm, or general ...How do I select/update my communications preferences? (Resident)
How to select communications preferences in Pilera? In this article we will show you how you to set your communications preferences. Messages from your community will be sent to you via the communications preferences you have set. Depending on ...